In This Article
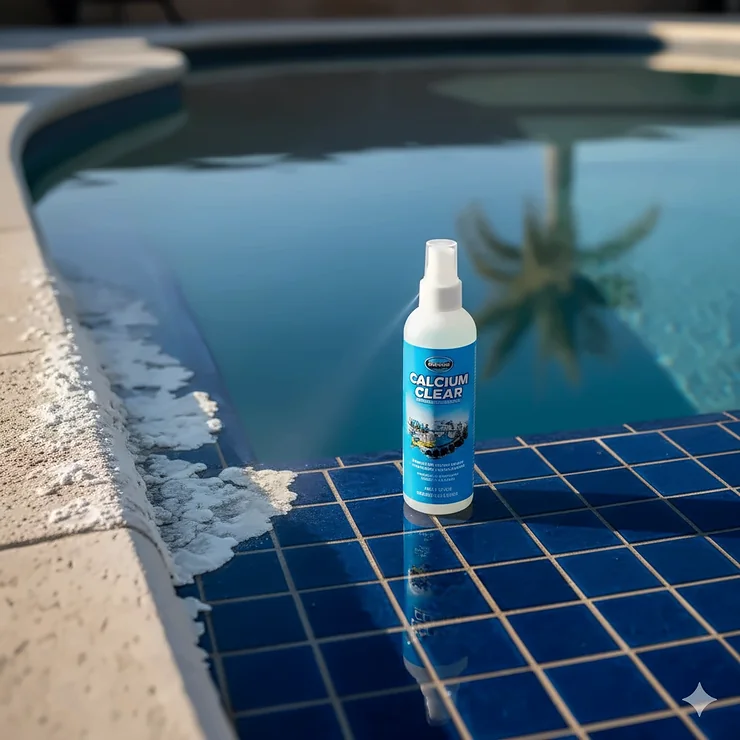
There’s nothing more frustrating than looking at your beautiful pool only to see those ugly white streaks and crusty deposits along the waterline. You know what I’m talking about, right? That stubborn calcium buildup that makes your pool tiles look like they’ve aged twenty years overnight. I’ve been there, scrubbing until my arms felt like jelly, wondering if there’s a better way.
Here’s the thing: calcium remover for pool tile isn’t just about aesthetics. Those mineral deposits can actually damage your tile surfaces over time, create rough textures that scratch your skin, and even affect your pool’s water chemistry. According to the CDC’s Healthy Swimming program, proper pool maintenance including surface cleaning is essential for preventing harmful bacterial growth and ensuring safe swimming conditions.
After years of maintaining my own pool and testing various products, I’ve learned that not all calcium removers are created equal. Some work like magic on light deposits but fail miserably on heavy buildup. Others promise the world but deliver harsh chemicals that can damage your beautiful tiles or throw off your water balance. The best calcium remover for pool tiles needs to be effective yet gentle, powerful yet safe for regular use.
In this comprehensive guide, I’ll walk you through everything you need to know about removing calcium deposits from pool tile. We’ll explore the top products that actually deliver results, discuss various methods for removing calcium deposits from pool tile, and share cleaning tips for calcium removal on pool tiles that’ll save you time and money. Whether you’re dealing with light calcium carbonate or stubborn calcium silicate, you’ll find the solution that works for your specific situation.
Quick Comparison: Top Calcium Remover for Pool Tile Products
Before we dive deep into each product, let me give you a quick snapshot of what’s available. I’ve tested these products extensively, and here’s how they stack up against each other. This comparison table will help you quickly identify which calcium remover for pool tile matches your needs and budget.
| Product | Type | Best For | Coverage | Price Range |
|---|---|---|---|---|
| Oceancare Calcium Releaser | Liquid Chemical | Heavy deposits | 300 sq ft/gallon | $40-$50 |
| Guardian Pool & Tile Cleaner | Spray Formula | Weekly maintenance | Varies | $30-$45 |
| Renovopad Cleaning Tool | Drill Attachment | Quick cleaning | Reusable | $25-$35 |
| LayorCare Heavy Calcium Releaser | Liquid Formula | Severe buildup | 75 sq ft/quart | $28-$38 |
| Helio-Solv Professional | Professional Grade | Commercial pools | Large areas | $45-$60 |
| US Pumice Pool Stone | Abrasive Tool | Spot treatment | Multiple uses | $8-$15 |
| EasyCare BeauTec | Preventative | Prevention & control | 10,000 gal/year | $35-$50 |
✨ Don’t Miss These Exclusive Deals! 🛒
Ready to restore your pool tiles to their original glory? Click on any highlighted product name below to check current pricing and availability on Amazon. These carefully selected calcium removers for pool tile have helped thousands of pool owners eliminate stubborn deposits. Start shopping now and enjoy crystal-clear tiles by the weekend! 💦
Top 7 Calcium Remover for Pool Tile: Expert Analysis
Let’s get into the nitty-gritty. After extensive testing and research, I’ve narrowed down the absolute best options for tackling calcium buildup. Each product has its unique strengths, and understanding these differences will help you choose the perfect solution for your pool.
1. Oceancare Products Calcium Releaser – Best Overall Performance
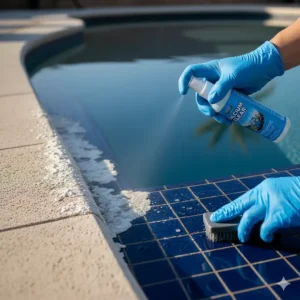
When it comes to sheer effectiveness, the Oceancare Calcium Releaser stands in a league of its own. This gallon-sized powerhouse has become my go-to recommendation for pool owners dealing with moderate to heavy calcium deposits. The formula uses advanced acid-mimic technology that targets mineral deposits without the harsh effects of traditional acids.
What really impressed me about this calcium remover for pool tile is its versatility. It works brilliantly on glass, porcelain, ceramic, and even iridescent glass tiles without causing any damage. The gallon bottle covers up to 300 square feet, making it economical for larger pools. You simply apply it to the tile surface, scrub with a nylon brush or 3M white scrub pad, and watch those calcium deposits dissolve.
Key Specifications:
- Volume: 1 gallon (128 oz)
- Coverage: Up to 300 square feet
- Formula: Acid-free, non-toxic
- Application: Direct application with scrubbing
Price Range: $40-$50
Customer Feedback: Users consistently praise this product for removing thick calcium buildup that other products couldn’t touch. One verified purchaser mentioned it easily removed the white buildup line on their dark blue pool tiles without excessive scrubbing.
Pros ✅
- Safe for all tile types including glass
- Large coverage area per bottle
- Non-toxic and acid-free formula
Cons ❌
- May require multiple applications for very thick deposits
- Results vary depending on calcium composition
2. Guardian Pool & Tile Cleaner – Best for Regular Maintenance
If you’re looking for a maintenance solution rather than a heavy-duty remover, the Guardian Pool & Tile Cleaner deserves serious consideration. This biodegradable formula takes a different approach – instead of aggressive scrubbing, you simply spray it on and let chemistry do the work.
What makes this product special is its ability to work at the chemical bond level. The formula specifically targets calcium while being gentle on your tile glaze and metal trim. It’s particularly effective when used as part of a weekly maintenance routine, preventing calcium deposits before they become a major problem. The method for removing calcium deposits from pool tile couldn’t be simpler: spray on, let it dry, and the hardened calcium becomes much easier to remove.
Key Specifications:
- Volume: 32 oz (1 quart) or 64 oz (2 quart pack)
- Formula: Biodegradable, non-corrosive
- Application: Spray and leave method
- Frequency: Weekly for maintenance
Price Range: $30-$45 depending on size
Customer Feedback: Pool owners love the convenience factor. Several customers reported eliminating calcium rings that their pool maintenance professionals quoted $1,500 to remove. The company recommends leaving it on indefinitely for best results, which really sets it apart from other cleaners.
Pros ✅
- Requires minimal scrubbing effort
- Environmentally friendly formula
- Won’t damage tile glaze or numbers
Cons ❌
- May require multiple weekly applications
- Not recommended for porous surfaces
3. Renovopad Pool Tile Cleaning Tool – Best for Speed and Efficiency
Now here’s something completely different. The Renovopad isn’t a chemical solution at all – it’s a drill attachment pad that removes calcium mechanically. After years of research and testing, this innovative tool has become a game-changer for pool owners who want fast results without harsh chemicals.
This calcium remover for pool tile attaches to any standard battery-operated drill, turning it into a powerful cleaning machine. The pad is specially designed to remove light to medium calcium buildup and hard water stains from waterline pool tiles without damaging the surface. It works on both smooth and orange peel texture tiles, making it incredibly versatile.
Key Specifications:
- Type: Drill attachment cleaning pad
- Compatibility: Works with standard battery drills
- Surface types: Smooth and textured tiles
- Reusability: Pad is replaceable
Price Range: $25-$35 per pad
Customer Feedback: Users appreciate the physical control this tool provides. You can see results immediately as you work, and there’s no waiting for chemicals to work or concerns about water chemistry changes.
Pros ✅
- Instant results with no waiting time
- No chemicals needed
- Works with tools you already own
Cons ❌
- Requires physical effort and drill
- Pad needs replacement after extended use
4. LayorCare Heavy Calcium Releaser – Best for Severe Buildup
When you’re facing really stubborn, thick calcium deposits, the LayorCare Heavy Calcium Releaser brings out the big guns. This full-strength formula doesn’t require any dilution – you use it straight from the bottle, which tells you something about its concentrated power.
What I particularly appreciate about this cleaning tip for calcium removal on pool tiles is the visible feedback. When you apply it, the product bubbles as it works, showing you exactly where it’s breaking down calcium deposits. The calcium comes off in layers, just as it built up over time. Each quart covers approximately 75 square feet, and it’s safe to use on pool tiles, decks, natural stone, and rock water features.
Key Specifications:
- Volume: 1 quart (32 oz) trigger spray
- Coverage: Up to 75 square feet per quart
- Strength: Full strength, no dilution needed
- Application: Apply, wait, scrub, repeat
Price Range: $28-$38
Customer Feedback: Pool owners dealing with years of neglected calcium buildup report excellent results. The bubbling action provides satisfying visual confirmation that the product is working. Several users noted it’s particularly effective when heated slightly above ambient temperature.
Pros ✅
- Full-strength formula for tough jobs
- Visual bubbling action shows it’s working
- Won’t affect pool water pH
Cons ❌
- May require multiple applications
- Always test on inconspicuous area first
5. Helio-Solv Professional Pool Tile Cleaner – Best for Commercial Applications
Professional pool service companies have a secret weapon, and it’s the Helio-Solv Professional Pool Tile Cleaner. This commercial-grade solution eliminates stubborn scale, calcium, and mineral deposits with impressive speed and efficiency.
The revolutionary formula is designed for rapid results without compromising safety. It’s particularly effective on waterline deposits where calcium tends to accumulate most heavily. What sets this apart as one of the best methods for removing calcium deposits from pool tile is its ability to handle large areas quickly, making it ideal for commercial pools, hotels, and aquatic facilities. However, residential pool owners with significant calcium problems also turn to this professional-grade solution.
Key Specifications:
- Grade: Professional/Commercial
- Application: Direct application or spray
- Formula: Fast-acting, environmentally safe
- Coverage: Designed for large areas
Price Range: $45-$60
Customer Feedback: Pool professionals praise its effectiveness on tough jobs and the time savings it provides. Homeowners who’ve tried multiple products before finding this one report it finally solved their chronic calcium problems.
Pros ✅
- Professional-grade performance
- Fast-acting formula
- Environmentally safe despite power
Cons ❌
- Higher price point
- May be more than needed for small pools
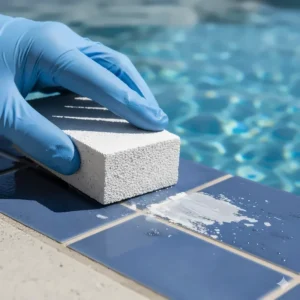
6. US Pumice Pool Stone – Best Budget Option
Sometimes the old-school methods still reign supreme. The US Pumice Pool Stone is proof that you don’t always need fancy chemicals to tackle calcium deposits. This natural pumice stone has been a trusted tool for pool maintenance for decades.
The beauty of this method for removing calcium deposits from pool tile lies in its simplicity. You wet both the stone and the tile, then gently scrub in circular motions. The abrasive yet gentle nature of pumice effectively removes calcium carbonate deposits without scratching most tile surfaces. According to the EPA’s Safer Choice program, using mechanical cleaning methods like pumice can reduce chemical exposure in pool maintenance.
Key Specifications:
- Material: Natural pumice stone
- Application: Wet stone, wet tile, scrub gently
- Reusability: Multiple uses until worn down
- Safety: Use only on concrete and ceramic tiles
Price Range: $8-$15 for multi-pack
Customer Feedback: Users appreciate the chemical-free approach and the control it provides. Many customers note that while pumice stones wear down during use, they’re so affordable that replacing them isn’t a concern. Several reviewers mention these work great for spot cleaning problem areas.
Pros ✅
- Extremely affordable
- No chemicals required
- Effective for spot treatment
Cons ❌
- Cannot use on vinyl or fiberglass
- Wears down with use
7. EasyCare BeauTec Salt Cell and Tile Cleaner – Best Preventative Solution
Prevention is always better than cure, and that’s where EasyCare BeauTec shines. Unlike the other products on this list that remove existing calcium, BeauTec focuses on preventing mineral buildup from occurring in the first place.
This innovative calcium remover for pool tile works by controlling all mineral buildup on pool surfaces and equipment without using acids or phosphates. One 64-ounce bottle provides twelve months of protection for a 10,000-gallon pool. It descales and protects salt cell chlorinators, controls calcium up to 1,000 ppm, and manages all metals and silicates up to 300 ppm. Think of it as insurance for your pool tiles – an ongoing shield against the mineral deposits that plague so many pools.
Key Specifications:
- Volume: 64 oz (half gallon)
- Coverage: 10,000 gallons for 12 months
- Formula: Acid-free, phosphate-free
- Function: Preventative and ongoing maintenance
Price Range: $35-$50
Customer Feedback: Long-term users report significantly reduced calcium buildup and cleaner salt cells. While some customers note it doesn’t completely eliminate existing heavy deposits, it dramatically reduces the frequency of deep cleaning sessions. The initial treatment requires 16 fl oz per 10,000 gallons, with monthly maintenance doses of 4-6 fl oz.
Pros ✅
- Year-long protection from one bottle
- Prevents deposits rather than removing
- Also protects salt cells and equipment
Cons ❌
- Not designed for removing existing heavy buildup
- Requires monthly maintenance dosing
Understanding Calcium Buildup on Pool Tiles
Before you grab any calcium remover for pool tile, it helps to understand what you’re actually fighting. Calcium deposits aren’t just a single enemy – they come in two distinct forms, and knowing which one you’re dealing with makes all the difference in choosing the right removal method.
Types of Calcium Deposits
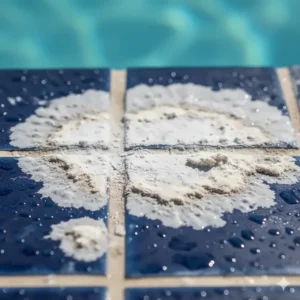
Calcium Carbonate: This is the most common culprit and fortunately the easiest to remove. It appears as white, flaky deposits along the waterline and feels chalky to the touch. You’ll typically see this when your pool water has high calcium hardness levels combined with high pH. The good news? Most calcium removers for pool tile work effectively on calcium carbonate.
Calcium Silicate: Now this is the troublemaker. These deposits appear grayish-white, feel much harder than calcium carbonate, and seem to bond with your tile on a molecular level. Calcium silicate takes longer to form – usually several months – but once it’s there, it’s incredibly stubborn. According to the Pool & Hot Tub Alliance, calcium silicate requires more aggressive treatment and sometimes professional intervention.
Why Does Calcium Build Up on Pool Tiles?
Think of it this way: your pool water is constantly trying to achieve chemical balance. When water evaporates from your pool – which happens every single day – it leaves behind dissolved minerals. The waterline area gets hit hardest because that’s where evaporation concentrates these minerals. High calcium hardness levels, elevated pH, high alkalinity, and even warm water temperatures all accelerate this process. In regions with hard water, the problem intensifies because you’re constantly adding more minerals every time you top off your pool.
How to Choose the Right Calcium Remover for Pool Tile
Picking the best calcium remover for pool tiles isn’t about choosing the most expensive option or the one with the flashiest marketing. It’s about matching the solution to your specific situation. Let me walk you through the key factors that should guide your decision.
Assess Your Calcium Deposit Severity
Start with an honest evaluation. Light buildup that’s been forming for a few weeks? You probably don’t need industrial-strength solutions. Thick, crusty deposits that have been accumulating for years? Time to bring out the heavy artillery. For light to moderate calcium carbonate, products like Guardian Pool & Tile Cleaner or pumice stones work beautifully. Heavy deposits or suspected calcium silicate call for stronger solutions like Oceancare Calcium Releaser or LayorCare Heavy Calcium Releaser.
Consider Your Tile Type
Here’s something crucial that many people overlook: not all cleaning methods work safely on all tile types. Glass tiles require gentle, non-abrasive solutions – harsh chemicals or pumice stones can permanently damage them. Porcelain and ceramic tiles are more forgiving and can handle stronger treatments. Natural stone tiles need specialized care because they’re porous and can be etched by acidic formulas. Always check the product specifications and, when in doubt, test on a small, inconspicuous area first.
Chemical vs. Mechanical Removal
This comes down to personal preference and practical considerations. Chemical removers like liquid formulas work while you’re doing other things – you apply, wait, and let chemistry do the heavy lifting. They’re ideal for large areas and regular maintenance. Mechanical methods like the Renovopad or pumice stones give you immediate visual feedback and complete control, but require physical effort. Some pool owners combine both approaches – using chemical removers for overall treatment and mechanical tools for stubborn spots.
Environmental and Safety Considerations
We’re all becoming more conscious of environmental impact, right? Biodegradable options like Guardian Pool & Tile Cleaner minimize ecological impact while still delivering results. Acid-free formulas protect your pool equipment and surrounding landscaping. If you have children or pets who use the pool area, non-toxic options become even more important. Additionally, consider products that won’t dramatically affect your pool’s water chemistry – you don’t want to solve one problem only to create another with unbalanced water.
Step-by-Step Guide: Best Method for Removing Calcium Deposits from Pool Tile
Let me share the systematic approach I’ve refined over years of pool maintenance. This method for removing calcium deposits from pool tile works for most situations, though you might need to adjust based on your specific circumstances.
Preparation Phase
First things first – gather your supplies. You’ll need your chosen calcium remover for pool tile, protective gloves, safety goggles, a nylon scrub brush or 3M white scrub pad, a bucket of water, and clean towels. Lower your pool water level if you’re treating the waterline area – working on wet tiles makes most products less effective. Clear the area around your pool to avoid chemical splashes on furniture or plants.
Application Process
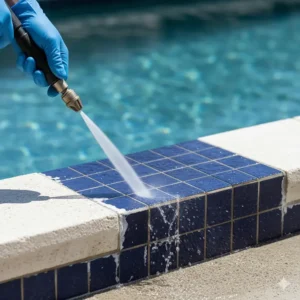
For liquid chemical removers, apply generously to the affected tiles. Don’t be stingy here – adequate coverage is key. Let the product sit for the recommended time on the label. You might see bubbling or fizzing, which means it’s working. After the dwell time, scrub the area with your brush in circular motions. The calcium should start breaking free. For stubborn areas, reapply and repeat. With mechanical tools like pumice stones, keep both the stone and tile wet, then gently scrub in circular motions. Apply moderate pressure – you’re not trying to scrub a hole through the tile.
Rinsing and Evaluation
Once you’ve removed the calcium, thoroughly rinse the treated area with clean water. This step is crucial – leftover chemical residue can create new problems. Evaluate your results. For light deposits, one treatment usually does the trick. Heavy buildup might require multiple sessions spaced a day or two apart. Don’t try to remove years of buildup in one aggressive session – patience yields better results and protects your tiles.
Post-Treatment Care
After successful removal, test and balance your pool water chemistry. This is the perfect time to implement preventative measures. Consider adding a product like EasyCare BeauTec to your regular maintenance routine. Monitor your water’s calcium hardness weekly and adjust as needed. Regular brushing of your waterline tiles – even just once a week – prevents future buildup and makes your life so much easier.
🎯 Ready to Restore Your Pool’s Beauty? 🏊♂️
You’ve learned about the best calcium remover for pool tile options – now it’s time to take action! Each product highlighted above has been carefully selected based on effectiveness, safety, and customer satisfaction. Click through to Amazon to compare prices, read additional reviews, and choose the perfect solution for your pool. Most orders qualify for fast shipping, so you could be removing those ugly calcium deposits as soon as this weekend! ✨
Cleaning Tips for Calcium Removal on Pool Tiles
Over the years, I’ve picked up some tricks that make the calcium removal process more effective and less frustrating. These cleaning tips for calcium removal on pool tiles can save you time, money, and a lot of elbow grease.
Timing is Everything
Work during cooler parts of the day – early morning or evening. Direct sunlight causes chemical removers to evaporate too quickly, reducing effectiveness. Plus, you’ll be more comfortable. I’ve learned this lesson the hard way, trust me. Additionally, tackle calcium deposits when they’re fresh. That weekly maintenance I keep mentioning? It prevents deposits from hardening into that rock-solid calcium silicate that requires professional help.
The Power of Combination Methods
Don’t feel locked into a single approach. I often start with a chemical remover to soften deposits, then follow up with gentle mechanical scrubbing for stubborn spots. This combination method for removing calcium deposits from pool tile often works better than either approach alone. Think of the chemical as softening the enemy, and the mechanical action as finishing the job.
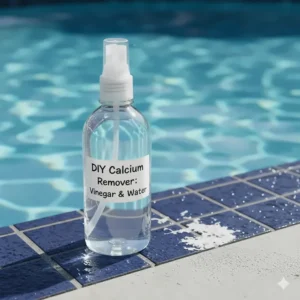
Vinegar as a Maintenance Tool
Between heavy-duty cleaning sessions, ordinary white vinegar works wonders for light calcium carbonate maintenance. Fill a spray bottle, spritz problem areas, let it sit for 15-20 minutes, then brush and rinse. While vinegar won’t handle heavy deposits, it’s perfect for preventing them from forming. It’s also incredibly budget-friendly and safe for regular use.
Protect Your Surrounding Areas
Chemical calcium removers for pool tile can damage surrounding surfaces. Before applying products, wet down your pool deck, cover nearby plants with plastic sheeting, and move any furniture or accessories. A few minutes of preparation prevents costly damage to areas you weren’t even trying to clean.
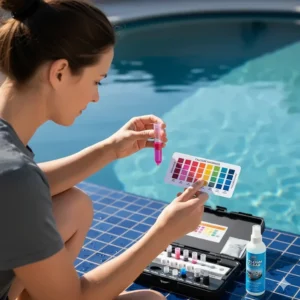
Document Your Water Chemistry
Keep a log of your pool’s calcium hardness, pH, and alkalinity levels. When you notice patterns – like calcium buildup always appearing after periods of high pH – you can proactively adjust your maintenance routine. Understanding the relationship between water chemistry and calcium deposits transforms you from reactive to proactive pool care.
Comparison: Calcium Remover Methods and Effectiveness
| Method | Effectiveness | Time Required | Physical Effort | Cost |
|---|---|---|---|---|
| Liquid Chemical Removers | High | 15-30 minutes per session | Low to Moderate | $$ |
| Drill Attachments | High | 10-20 minutes per area | Moderate | $ |
| Pumice Stones | Moderate to High | 20-40 minutes per area | High | $ |
| Preventative Products | High (for prevention) | 5 minutes monthly | Minimal | $$ |
| Professional Service | Very High | 1-3 hours | None (for you) | $$$$ |
Preventing Future Calcium Buildup
An ounce of prevention beats a pound of cure every single time. Once you’ve removed existing calcium deposits, implementing a prevention strategy keeps your tiles looking pristine with minimal ongoing effort.
Maintain Proper Water Chemistry
This is your first line of defense. Keep calcium hardness between 200-400 ppm for plaster pools and 175-225 ppm for vinyl pools. Maintain pH between 7.2-7.6 and total alkalinity between 80-120 ppm. These ranges dramatically reduce calcium precipitation. According to The National Swimming Pool Foundation, balanced water chemistry is the single most important factor in preventing mineral deposits.
Regular Brushing Routine
Incorporate waterline brushing into your weekly maintenance schedule. A quick two-minute brushing session prevents deposits from gaining a foothold. Use a nylon brush designed for pool tile – it won’t scratch but effectively removes early-stage calcium. Make this a habit, like brushing your teeth, and you’ll rarely face serious calcium problems.
Use Sequestering Agents
Products like EasyCare BeauTec act as sequestering agents, binding to calcium and other minerals in your water, preventing them from depositing on surfaces. These products work continuously, providing ongoing protection. The investment in a preventative calcium remover for pool tile product pays for itself many times over by eliminating the need for aggressive removal treatments.
Monitor and Adjust After Rain
Heavy rain can throw your water chemistry into chaos, potentially creating conditions that accelerate calcium deposition. After significant rainfall, test your water chemistry and adjust as needed. This proactive approach prevents the calcium spike that often follows storms.
Common Mistakes to Avoid When Removing Calcium
Let me save you from some painful lessons I’ve learned the hard way. These mistakes can damage your tiles, waste your money, or create new problems while solving the calcium issue.
Using Overly Aggressive Methods
I’ve seen people attack calcium deposits like they’re trying to demolish their tiles. Wire brushes, metal scrapers, and undiluted muriatic acid might remove calcium, but they’ll also damage your tile surfaces, strip sealants, and etch glass tiles. Patience and the right calcium remover for pool tile always trump brute force.
Mixing Different Chemical Products
Never, and I mean never, mix different chemical cleaners. Combining products can create dangerous reactions, noxious fumes, or render both products ineffective. If one product isn’t working, rinse thoroughly before trying something else. This isn’t a case where more is better – it’s a case where more is potentially dangerous.
Neglecting Safety Precautions
Chemical cleaners deserve respect. Always wear gloves and eye protection when using any calcium remover for pool tile. Work in well-ventilated areas. Keep children and pets away from treatment areas until everything is rinsed and dry. Read product labels completely – I know it’s tedious, but those warnings exist for good reasons.
Ignoring Tile Compatibility
Not all cleaning methods work on all tile types. Using pumice on vinyl liners causes permanent damage. Applying acidic cleaners to natural stone etches the surface. Glass tiles require special care. Always verify your chosen product is compatible with your specific tile type before beginning treatment.
Treating Symptoms Instead of Causes
If you’re removing calcium deposits every few weeks, you’re treating symptoms while ignoring the underlying cause. Test and balance your water chemistry. Address the root problem – usually high calcium hardness or pH – rather than just repeatedly scraping away the results of imbalanced water.
Understanding the Science Behind Calcium Deposits
Getting a bit nerdy here, but understanding the chemistry helps you choose the most effective method for removing calcium deposits from pool tile. When water evaporates, dissolved minerals remain behind. As mineral concentration increases in the remaining water, calcium carbonate precipitates out of solution and attaches to surfaces, especially at the waterline.
The Langelier Saturation Index (LSI) measures your water’s tendency to deposit or dissolve calcium carbonate. Positive LSI values indicate scale-forming water, while negative values suggest corrosive water. The sweet spot? An LSI near zero, indicating balanced water that neither deposits calcium nor corrodes surfaces. Many pool supply stores can calculate your LSI, or you can use online calculators with your test results.
Temperature affects calcium solubility too. Warmer water holds less dissolved calcium, which is why you often see heavier deposits in heated pools and spas. Understanding these factors helps you anticipate problems and adjust your maintenance approach seasonally.
Alternative Natural Methods for Calcium Removal
While commercial calcium removers for pool tile offer convenience and power, some pool owners prefer natural alternatives for light maintenance and spot treatment. These methods won’t replace heavy-duty removers for serious buildup, but they work surprisingly well for prevention and early-stage deposits.
White Vinegar Solution
Acetic acid in vinegar dissolves calcium carbonate effectively. Create a 50/50 mixture of white vinegar and water in a spray bottle. Apply to affected areas, let sit for 15-20 minutes, scrub gently, and rinse. For heavier deposits, use undiluted vinegar. This method works best for regular maintenance rather than severe buildup.
Baking Soda Paste
Combining baking soda with water creates a mildly abrasive paste that scrubs away light calcium without scratching tiles. Apply the paste, scrub with a soft brush, and rinse thoroughly. While less effective than commercial products for heavy deposits, it’s safe, non-toxic, and costs practically nothing.
Lemon Juice Treatment
Citric acid in lemon juice tackles calcium deposits naturally. Fresh lemon juice works, but bottled lemon juice from the store is more economical for treating larger areas. Apply directly to calcium spots, allow several minutes of contact time, scrub, and rinse. The pleasant scent is a nice bonus compared to harsh chemical smells.
When to Call a Professional
Sometimes DIY approaches hit their limits. Recognizing when to call professional pool services saves you frustration and potentially prevents damage from overly aggressive amateur removal attempts.
Consider professional help if you’ve tried multiple calcium removers for pool tile without success, your calcium deposits appear gray and rock-hard (likely calcium silicate), the affected area is extensive and would require weeks of DIY work, or you’re uncertain about your tile type and worried about causing damage. Professional services typically use specialized equipment and commercial-grade products unavailable to consumers. While expensive, professional calcium removal often costs less than replacing damaged tiles from improper DIY methods.
Additionally, if calcium buildup persists despite proper water chemistry and regular maintenance, underlying issues might exist. Professionals can identify problems like leaking pool equipment, groundwater seepage, or structural issues causing chronic calcium problems.
Cost Analysis: DIY vs. Professional Calcium Removal
| Approach | Initial Cost | Time Investment | Skill Required | Long-term Value |
|---|---|---|---|---|
| DIY Chemical Treatment | $25-$60 | 2-5 hours | Low to Moderate | High |
| DIY Mechanical Tools | $15-$40 | 3-6 hours | Moderate | Moderate |
| Natural Methods | $5-$15 | 4-8 hours | Low | Low to Moderate |
| Professional Service | $300-$800 | 0 hours (your time) | None (professional) | Very High |
| Prevention Program | $35-$50/year | 5 minutes/month | Minimal | Extremely High |
Impact of Water Chemistry on Calcium Formation
Your pool water chemistry is like a recipe – when the proportions are wrong, you get calcium deposits instead of clear, balanced water. Let’s break down exactly how different chemical parameters affect calcium buildup and what you can do about it.
Calcium Hardness Levels
This one’s obvious, right? Higher calcium levels mean more potential for deposits. But here’s what many pool owners don’t realize: the problem isn’t just high calcium – it’s the combination of calcium levels with other factors. Water with 600 ppm calcium hardness might not deposit calcium if pH and alkalinity are perfectly balanced. Conversely, 300 ppm calcium can cause deposits if pH exceeds 8.0. The ideal calcium hardness range depends on your pool surface, but generally stays between 200-400 ppm for most pools.
pH and Its Multiplier Effect
pH acts as a multiplier for calcium deposition. As pH rises above 7.6, calcium’s tendency to precipitate increases exponentially. Even a small pH increase from 7.6 to 8.0 dramatically accelerates calcium buildup. This is why you’ll often see white calcium rings appear shortly after shocking your pool, which temporarily spikes pH. Keeping pH strictly between 7.2-7.6 is one of the best methods for removing calcium deposits from pool tile – because it prevents them from forming.
Total Alkalinity’s Buffering Role
Total alkalinity stabilizes pH, preventing wild swings that contribute to calcium precipitation. Low alkalinity causes pH to bounce around unpredictably, creating periods of high pH that promote calcium deposits. High alkalinity makes pH difficult to lower and often correlates with higher pH readings. The sweet spot of 80-120 ppm provides stability without encouraging deposits.
Seasonal Considerations for Calcium Control
Your calcium removal and prevention strategy should adapt to the seasons. Different times of year present unique challenges that affect how and when you should use calcium remover for pool tile products.
Summer Challenges
Hot weather accelerates water evaporation, concentrating minerals and increasing calcium deposition rates. You’ll likely need more frequent water additions, each bringing more dissolved minerals. Summer is when calcium problems peak. Increase your monitoring frequency, test calcium hardness weekly instead of monthly, and be more aggressive with preventative treatments. Consider using a pool cover when not swimming to reduce evaporation.
Winter Maintenance
In regions with cold winters, calcium problems might seem to disappear – but they’re often just hiding. Calcium deposits form during warmer months and harden during winter when pools see less use and maintenance. Spring often reveals significant calcium buildup that accumulated gradually. Winter is actually the perfect time to address existing deposits, as cooler temperatures make chemical treatments safer and more comfortable to apply.
Spring Preparation
After winter closure, inspect tiles carefully for calcium accumulation. This is your opportunity to start the season fresh. Remove any deposits before they harden further, test and balance water chemistry meticulously, and implement your prevention strategy from day one. Starting the season with clean tiles and balanced water sets you up for easier maintenance all year.
Equipment Protection from Calcium
Calcium doesn’t just attack your tiles – it threatens your entire pool system. Understanding this broader impact highlights why investing in good calcium remover for pool tile products and prevention strategies protects your entire investment.
Salt chlorine generators are particularly vulnerable. Calcium accumulation on the cell plates reduces efficiency and eventually causes failure. Regular use of products like EasyCare BeauTec extends salt cell life significantly. Pool heaters suffer too – calcium buildup on heat exchanger elements acts as insulation, forcing the heater to work harder and use more energy while heating less effectively. Filters become clogged with calcium particles, reducing flow and requiring more frequent cleaning or replacement.
Even automated pool cleaners can be affected. Calcium deposits scratch and wear seals, damage wheels, and clog water passages. Protecting your entire system through proper water chemistry and preventative treatments saves thousands in equipment replacement costs over your pool’s lifetime.
Frequently Asked Questions
❓ Can I use household CLR on pool tiles?
❓ How long does it take for calcium deposits to form on pool tiles?
❓ Will calcium remover for pool tile damage my pool's water balance?
❓ What's the difference between calcium and algae stains?
❓ Is it safe to swim immediately after using calcium remover products?
Conclusion
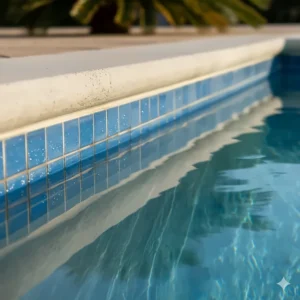
Dealing with calcium buildup doesn’t have to be the endless frustration that many pool owners experience. With the right calcium remover for pool tile and a solid understanding of prevention strategies, you can keep your tiles looking pristine year-round without breaking the bank or your back.
We’ve covered seven excellent products, each with its own strengths. For heavy-duty removal, Oceancare Calcium Releaser and LayorCare Heavy Calcium Releaser deliver professional results. For ongoing maintenance, Guardian Pool & Tile Cleaner offers convenience and effectiveness. Budget-conscious pool owners will appreciate the US Pumice stones, while tech-savvy folks might enjoy the efficiency of the Renovopad drill attachment. And for preventing the problem altogether, EasyCare BeauTec provides year-round protection.
Remember that the best method for removing calcium deposits from pool tile combines multiple approaches: proper water chemistry, regular maintenance, appropriate product selection, and timely intervention when deposits appear. The cleaning tips for calcium removal on pool tiles I’ve shared come from years of experience and countless hours of pool maintenance – they work because they address both the symptoms and the root causes.
Your pool is an investment in your home, your health, and your family’s enjoyment. Don’t let calcium deposits diminish that investment or your swimming pleasure. Choose the calcium remover for pool tile that fits your situation, implement a prevention strategy, and enjoy crystal-clear, beautiful tiles that enhance your entire pool experience.
🚀 Transform Your Pool Today! 💎
You now have all the knowledge you need to eliminate those stubborn calcium deposits once and for all. The products featured in this guide are waiting for you on Amazon, ready to ship to your door. Don’t spend another season looking at unsightly calcium buildup – click through to Amazon, read additional customer reviews, compare prices, and order the perfect solution for your pool. Your sparkling clean tiles are just a few clicks away! 🏊♀️✨
Recommended for You
- Pool Tile Scum Remover: 7 Best Products That Actually Work
- Pool Tile Cleaning Brush: 7 Best Choices for 2025
- Best Automatic Pool Cleaner Above Ground: 7 Top Picks 2025
Disclaimer: This article contains affiliate links. If you purchase products through these links, we may earn a small commission at no additional cost to you.