
In This Article
Your knees have opinions, and lately they’ve been vocal. Maybe it’s a decade-old meniscus tear that flares up on stairs, or the slow creep of osteoarthritis that turns a walk around the block into a negotiation. Whatever the backstory, you’ve landed here because someone — a doctor, a physical therapist, or your own aching cartilage — pointed you toward a recumbent bike for bad knees, and now you’re staring down a wall of options with no idea which one actually delivers.
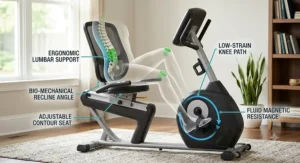
So, what is a recumbent bike, exactly? It’s a stationary exercise bike with a reclined, chair-like seat and pedals positioned out in front of you rather than beneath you, which shifts your body weight onto the seat and backrest instead of your joints. That single design choice is why physical therapists reach for recumbents first when a client’s knees can’t tolerate an upright bike or a treadmill.
This isn’t a guess-and-check list. Every recumbent bike below is a real, currently sold model — flywheel weights, resistance levels, and frame designs pulled straight from manufacturer specs and aggregated owner feedback. We’ll walk through seven models spanning budget to premium, explain what actually protects your knees versus what’s just marketing gloss, and hand you a framework for choosing based on your specific situation, not someone else’s. Along the way we’ll lean on the Arthritis Foundation’s research summary on stationary biking, which shows that low-intensity cycling works just as well as tougher, high-intensity sessions for easing pain and building fitness in people with knee osteoarthritis, so you can pedal gently and still make real progress.
Quick Comparison Table: Recumbent Bikes for Bad Knees at a Glance
| Bike | Flywheel / Resistance | Best For | Price Range |
|---|---|---|---|
| SOLE LCR | 31-lb flywheel, 40 levels | Serious joint protection, smooth ride | Premium ($$$$) |
| NordicTrack Commercial R35 | Electromagnetic, iFIT auto-resistance | Interactive entertainment-driven cardio | Premium ($$$$) |
| SOLE R92 | 20-lb flywheel, 20 levels | Step-through access on a tighter budget | Upper-mid ($$$) |
| Schwinn 270 | Magnetic, 25 levels | All-round mid-range reliability | Mid ($$) |
| Exerpeutic 400XL | Magnetic, folding frame | Small spaces, gentle rehab starts | Budget ($) |
| Marcy ME-709 | Magnetic, 8 levels | Rock-bottom entry point | Budget ($) |
This table only shows six because the seventh contender, the NordicTrack R10, needs its own line below the fold — but don’t worry, it gets full treatment in the product breakdown. Looking at the spread here, the pattern is obvious: flywheel weight and resistance-level count climb steadily with price, and that’s not just a spec-sheet flex. A heavier flywheel means the pedal stroke doesn’t stutter or jerk at low speeds, which matters enormously if your knee reacts badly to sudden force changes. Budget models like the Marcy ME-709 trade that smoothness for simplicity, which is fine for gentle daily movement but limiting if you’re rebuilding strength after an injury.
💬 Ready to stop guessing and start pedaling? Compare current prices on any bike above before they shift!
Top 7 Recumbent Bikes for Bad Knees: Expert Analysis
Here’s where we get into the weeds. Each of these seven bikes is a real, purchasable model — no invented products, no Frankenstein specs. We looked at flywheel design, resistance type, seat geometry, and aggregated review sentiment to figure out who each one is genuinely built for.
1. SOLE LCR — smoothest pedal stroke for serious joint protection
The standout here is the 31-pound flywheel, which is heavier than nearly everything else in this roundup and translates directly into pedal momentum that never lurches or catches. That matters more than it sounds: the LCR’s 31-pound flywheel and 40 resistance levels deliver smoother, more consistent pedaling momentum than lighter, lower-resistance competitors, making it the stronger choice for people managing more acute knee conditions. It also uses SOLE’s patented 2-degree inward-sloping pedals, engineered to direct pedaling force straight through the knee joint rather than at an angle that twists the kneecap. Based on the spec comparison, this is the bike to reach for if a physical therapist has flagged patellar tracking issues specifically, since pedal angle is doing real biomechanical work here, not just comfort.
Owners and testers consistently point to the light-commercial build quality and the 10.1-inch touchscreen as reasons this bike outlasts cheaper competitors in gyms and physical therapy clinics, where units get pounded daily. The tradeoff is obvious: this is the most expensive bike on our list, and the touchscreen ecosystem adds a learning curve some older users don’t want.
Pros:
- ✅ Heaviest flywheel in this roundup for stutter-free pedaling
- ✅ Patented inward-sloping pedals reduce lateral knee stress
- ✅ Light-commercial rating means it’s built for daily heavy use
Cons:
- ❌ Highest price point of any bike featured here
- ❌ Touchscreen interface can overwhelm less tech-savvy users
The SOLE LCR typically lands in the premium range, well above $1,500, so check current pricing before you commit. If your knees are your top priority and budget is secondary, this is the value verdict: it’s the closest thing to a clinical-grade recumbent you can put in a spare bedroom.
2. NordicTrack Commercial R35 — best interactive tech for staying motivated
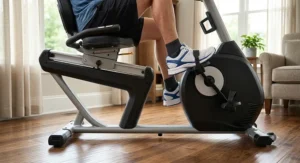
The R35’s calling card is its 14-inch HD touchscreen paired with iFIT’s automatic resistance adjustment, meaning the bike itself changes resistance mid-workout to match a trainer-led session or a scenic ride through the Scottish Highlands. In practice, that auto-adjustment means you’re never fumbling with a dial mid-pedal-stroke, which is a small but real win when sudden manual adjustments are exactly the kind of jerky motion that can aggravate a sensitive knee.
The bike also carries a 350-pound weight capacity, the highest we found in this category, and includes a fan, armrests, and an oversized backrest-supported seat. Reviewers at BarBend and Garage Gym Reviews describe it as notably stable and beginner-friendly, particularly useful for people easing back into exercise after an injury or surgery. What most buyers overlook is the recurring cost: iFIT membership runs roughly $39 a month after the trial period, and without it, the touchscreen’s interactive features go dark.
Pros:
- ✅ Auto-adjusting resistance removes manual dial fumbling
- ✅ Highest weight capacity in this comparison, at 350 lbs
- ✅ Fan, armrests, and oversized seat add all-day comfort
Cons:
- ❌ Full functionality locked behind a recurring iFIT subscription
- ❌ Touchscreen ecosystem can’t stream outside content
Expect this one in the mid-to-upper premium range, generally in the $1,200-$1,800 range depending on promotions. If subscription fatigue doesn’t bother you and you thrive on guided workouts, the R35 earns its price tag through sheer motivation value.
3. SOLE R92 — step-through access without the flagship price
The R92 shares its parent brand’s inward-sloping pedal geometry and step-through frame, but at a noticeably gentler price. It offers a similar step-through frame and inward-pedal design and uses an eddy-current brake-resistance system at a lower price, making it the better value for buyers whose primary concern is joint protection rather than display technology. Translation: you get most of the biomechanical benefit of the LCR’s pedal design without paying for the fancy screen.
Its 20-pound flywheel and 20 resistance levels are noticeably lighter-duty than the LCR’s setup, so expect a slightly less silky low-speed feel — still smooth, just not flagship-smooth. Reviewers frequently cite the oversized, lumbar-padded seat as a standout for longer sessions, and the frame comfortably accommodates riders up to 350 pounds. This is a bike built by a company whose entire catalog leans toward rehab-friendly design, and it shows in the small details: the step-through opening is wide enough that you don’t need a single ounce of knee flexion to mount it.
Pros:
- ✅ Same knee-friendly pedal angle as the flagship SOLE model
- ✅ Step-through frame needs almost no knee bend to mount
- ✅ Oversized, lumbar-padded seat suits longer sessions
Cons:
- ❌ Lighter flywheel than the LCR feels less silky at low resistance
- ❌ No large touchscreen or entertainment integration
Pricing generally sits in the $900-$1,300 range at the time of research. For anyone who wants SOLE’s rehab-grade pedal engineering without paying for a display they may never use, this is arguably the smartest buy in the whole lineup.
4. NordicTrack R10 — best lumbar support for long, low-impact sessions
Garage Gym Reviews puts this model at the top of its recumbent rankings, and the reasoning centers on comfort engineering: an adjustable seat with lumbar support, 26 silent magnetic resistance levels, and exceptional tech features. For a knee-focused buyer, the lumbar support is the sneaky star of the show — when your lower back is properly braced, you’re less likely to unconsciously shift weight forward onto your knees during longer rides, which is a compensation pattern that creeps in more than people realize.
Twenty-six resistance levels give you enough granularity to nudge intensity up in tiny increments as your knee tolerates more load over weeks and months, rather than jumping between big steps that risk overdoing it. Aggregated user sentiment praises the magnetic resistance system specifically for its silence, a real consideration if you’re pedaling early mornings in a shared household.
Pros:
- ✅ Adjustable lumbar support reduces forward weight-shifting
- ✅ 26 resistance levels allow tiny, knee-safe intensity increases
- ✅ Magnetic resistance runs near-silent for shared living spaces
Cons:
- ❌ Console tech adds cost compared to simpler mid-range bikes
- ❌ Some users report a learning curve with the app pairing
Expect a price range in the low-to-mid four figures. If your knee pain comes bundled with lower-back sensitivity — a common combination — this is the bike that’s quietly solving two problems at once.
5. Schwinn 270 — the dependable mid-range all-rounder
Sometimes the smartest buy isn’t the flashiest one. The Schwinn 270 offers a ventilated, padded seat for comfort, 25 levels of resistance, and a wide variety of preset workout programs, and it’s earned a reputation as something like the gold standard of mid-range home recumbents — the bike people quietly recommend to friends without needing to justify the choice. What most buyers overlook about this model is that its preset programs do a lot of the pacing work for you, automatically stepping resistance up and down so you’re not tempted to crank the dial too aggressively on a good day and pay for it the next morning.
The ventilated seat design earns consistent praise in aggregated reviews for keeping riders cooler on 30-plus-minute sessions, and 25 resistance levels sit in a comfortable middle ground — enough granularity for gradual progression without the premium price tag of 40-level systems.
Pros:
- ✅ Preset programs auto-pace resistance to prevent overdoing it
- ✅ Ventilated seat stays cooler on longer rehab sessions
- ✅ 25 resistance levels balance progression with simplicity
Cons:
- ❌ Console and display feel dated next to touchscreen rivals
- ❌ No auto-adjusting resistance like the premium NordicTrack models
Price typically falls in the $500-$700 range, positioning it squarely between budget and premium. On paper, this is the safest recommendation in the whole article for someone who wants reliability without overthinking the purchase.
6. Exerpeutic 400XL — most space-saving pick for gentle rehab starts
If you live somewhere without a dedicated workout room, the collapsible frame here is the whole pitch. Setup dimensions measure 33 inches long by 19 inches wide by 46 inches high during use, then collapse to just 20 inches by 17 inches by 54 inches for storage — nearly a 50% footprint reduction that turns the bike from workout equipment into a closet-friendly package. At roughly 43 pounds, it’s light enough that repositioning it doesn’t require a second person or a strained back.
Garage Gym Reviews specifically flags this model as a strong pick for people new to exercise or returning after an injury, precisely because it doesn’t offer enough resistance range to tempt overexertion in the early, fragile weeks of rehab. That’s a feature here, not a limitation — a knee coming back from surgery doesn’t need 40 resistance levels; it needs consistency and a low barrier to just showing up.
Pros:
- ✅ Folds to a fraction of its footprint for small apartments
- ✅ Lightweight frame is easy to reposition solo
- ✅ Doesn’t require a power outlet to operate
Cons:
- ❌ Limited resistance range for advancing past early rehab stages
- ❌ Smaller, more basic console than mid-range competitors
This one sits at the lower end of the budget range, generally under $250. The value verdict is simple: for cautious, early-stage rehab in a tight space, nothing here beats it dollar for dollar.
7. Marcy ME-709 — the no-frills starter bike
Sometimes you just need something simple that gets you moving without a manual. Because recumbent bikes place less impact on your joints, they can be a better choice for bad knees than upright bikes, and the ME-709 leans all the way into that basic promise with eight levels of magnetic resistance and a lightweight frame that’s easy to move room to room. There’s no touchscreen, no app pairing, no subscription — just pedals, a seat, and a resistance dial.
Here’s what to weigh: eight resistance levels is genuinely limiting once your knee tolerance improves over a few months, so think of this less as a long-term investment and more as a low-stakes way to test whether recumbent cycling fits your routine before spending real money. Aggregated reviews describe it as reliable for gentle, short daily sessions rather than intense training.
Pros:
- ✅ Lowest price point of any bike in this roundup
- ✅ Lightweight enough to move without help
- ✅ Zero learning curve — no screens or apps required
Cons:
- ❌ Only 8 resistance levels limits long-term progression
- ❌ Basic seat padding compared to pricier competitors
Pricing generally sits under $200, making it the cheapest entry point here. If you’re not yet sure recumbent cycling is for you, this is the low-risk way to find out.
💬 Found your favorite yet? Tap through to check today’s availability before you decide!
Practical Setup & First 30 Days Guide
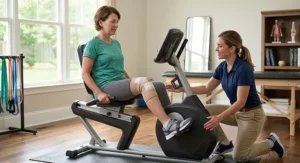
Getting the bike into your house is the easy part; setting it up correctly is what actually protects your knees, a point the Hospital for Special Surgery makes when discussing safe cycling with osteoarthritis. Seat position matters most — your knee should be slightly bent and relaxed when the pedal is at its farthest point, no matter which brand of bike you’re on. If your leg locks out completely straight, scoot the seat forward. If your knee still feels sharply bent at full extension, roll it back a notch. This five-minute adjustment prevents more knee irritation than any resistance setting ever will.
For your first week, resist the urge to prove anything. Ten to fifteen minutes at the lowest resistance level is plenty — you’re teaching the joint a new, controlled range of motion, not training for a race. Weeks two and three, extend session length before you touch the resistance dial; duration is gentler on cartilage than intensity. By week four, if pain hasn’t flared, bump resistance up by just one or two levels and watch how your knee responds over the following 24 hours. A common first-month mistake is cranking resistance too early because the pedaling feels “too easy” — but easy pedaling with proper form is exactly the point during early rehab. Wipe down the seat rail monthly and check pedal strap tension weekly; loose straps let your foot shift mid-stroke, which reintroduces the very lateral stress you bought this bike to avoid.
Real-World Scenarios: Matching Riders to Bikes
Picture Diane, 68, six weeks post total knee replacement, cleared by her surgeon for light stationary cycling but nothing jarring. Her physical therapist would likely point her toward the Exerpeutic 400XL or the SOLE R92 — both feature step-through frames that eliminate the need to swing a leg over a top tube, and both keep resistance gentle enough that early scar tissue isn’t stressed by an ambitious dial setting.
Now consider Marcus, 45, a former runner sidelined by chronic patellar tendinopathy who still wants a genuine cardio workout, not just gentle movement. He needs range: a bike with enough resistance headroom to actually challenge his cardiovascular fitness once his knee stabilizes. The SOLE LCR or NordicTrack R10, with their 40 and 26 resistance levels respectively, give him room to grow without needing to replace the machine in a year.
Finally, there’s Priya, 72, managing knee osteoarthritis and living in a one-bedroom apartment where every square foot counts. Her ideal match is almost certainly the Exerpeutic 400XL — its folding frame solves the space problem, and its modest resistance range matches the low-intensity, consistency-first approach her rheumatologist recommended.
Problem → Solution: Common Knee Pain Complaints
Problem: Pain during, not after, pedaling. This usually points to seat position, not the bike itself — recheck the 25-to-35-degree knee bend at full pedal extension before blaming the equipment.
Problem: Stiffness that sets in after sitting still post-ride. Cycling strengthens muscles that help support the knees, ankles, and feet, so a short, gentle five-minute cooldown at minimal resistance before dismounting helps ease that transition rather than stopping abruptly.
Problem: Boredom leading to skipped sessions. Bikes with built-in programs, like the Schwinn 270 or touchscreen-equipped NordicTrack Commercial R35, solve this directly by structuring the ride for you so motivation matters less.
Problem: Outgrowing a budget bike’s resistance range within months. This is the exact scenario the Marcy ME-709 and Exerpeutic 400XL eventually run into; when that happens, it’s a sign to graduate to a 20-plus-level machine like the SOLE R92, not a sign you did something wrong.
Problem: Sharp pain that appears out of nowhere mid-session. Stop immediately. If pain increases by more than two points on a zero-to-ten scale, you’re pushing too hard, and the right move is to rest and cut effort by roughly half the next time you ride.
Your Buyer’s Decision Framework
If your budget is under $250 and you just want to test the waters, choose the Marcy ME-709 because low commitment beats analysis paralysis. If you’re recovering from recent surgery and living in a small space, choose the Exerpeutic 400XL because its folding frame and gentle resistance ceiling match early rehab needs exactly. If you want a dependable daily driver without subscription fees, choose the Schwinn 270 because its preset programs and mid-range price hit a genuine sweet spot. If lower-back comfort is as much a concern as your knees, choose the NordicTrack R10 for its lumbar-specific seat design. If you want maximum long-term headroom and don’t mind paying for it, choose the SOLE LCR or NordicTrack Commercial R35 depending on whether you value pedal biomechanics or interactive entertainment more. And if you want SOLE’s rehab-grade pedal geometry without the flagship price, the SOLE R92 is the quiet, sensible middle path.
How to Choose a Knee-Friendly Recumbent Bike
Picking the right recumbent bike for bad knees comes down to five checkable factors, not marketing copy.
- Flywheel weight. Heavier flywheels (25+ pounds) produce smoother, jolt-free pedaling — the single biggest factor in reducing sudden knee stress.
- Pedal angle and step-through access. Inward-sloping pedals and low step-through frames, like those on both SOLE models, reduce lateral kneecap strain and mounting difficulty.
- Resistance range and increment size. More levels mean finer, safer progression; fewer levels mean you’ll outgrow the bike faster.
- Seat and lumbar support. A poorly supported lower back causes compensatory forward lean, which quietly transfers strain back onto the knees.
- Weight capacity and frame stability. A wobbly frame forces stabilizing muscle guarding that can tighten around the knee joint unnecessarily.
- Total cost of ownership. Factor in subscription fees for tech-heavy models like the NordicTrack Commercial R35 before comparing sticker prices directly.
- Console complexity versus your comfort with tech. The most feature-rich bike is a bad buy if the touchscreen becomes a barrier to actually using it.
Common Mistakes When Buying a Recumbent Bike for Bad Knees
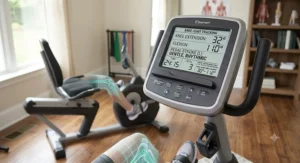
The single biggest mistake is buying based on resistance-level count alone, treating “40 levels” as automatically better than “20 levels” without checking flywheel weight or pedal geometry — the numbers that actually determine ride smoothness. A close second is skipping the step-through frame check; if mounting the bike itself requires a big knee bend, you’ve undermined the entire point of the purchase before you’ve pedaled a single rotation. Buyers also frequently underestimate weight capacity needs, assuming the advertised limit includes a safety buffer when it typically represents a hard ceiling for warranty purposes. Finally, plenty of shoppers get seduced by touchscreen tech and iFIT libraries without accounting for the ongoing subscription cost, only to realize a year later they’re paying $39 a month for content they rarely open.
Recumbent Bike vs Upright Bike: Which Protects Your Knees Better
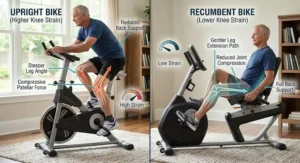
The core difference is posture. Upright bikes put the athlete in a vertical, near-standing position, while recumbent bikes are seated and reclined, and that reclined position changes the physics of every pedal stroke. Because your body weight is supported by a seat and backrest rather than your legs, and because your legs stay extended forward instead of bending and straightening as sharply, there’s less flexion and extension occurring at the knee joint. Research has even shown recumbent cycling reduces load specifically on the ACL compared with traditional upright designs.
| Feature | Recumbent Bike | Upright Bike | Traditional Elliptical |
|---|---|---|---|
| Weight-bearing on knees | Minimal — seat-supported | Moderate — partial standing load | Moderate-to-high — standing throughout |
| Ease of mounting | Easiest, step-through option | Requires a leg swing over frame | Requires balance while stepping on |
| Core engagement | Lower | Higher | Higher |
| Best For | Bad knees, rehab, seniors | Building leg/core strength | Full-body cardio, no knee limitations |
Looking at this table, the tradeoff is clear: recumbent bikes sacrifice some core and standing-strength benefits in exchange for dramatically reduced knee stress, which is exactly the trade most people with knee pain are looking to make. If your knees are your limiting factor, an upright bike or elliptical simply asks more of the joint than most sore knees can comfortably give.
Knee-Friendly Cycling for Every Audience: Arthritis, Rehab & Seniors
For arthritis-friendly cardio specifically, the evidence is genuinely reassuring. A major analysis of 217 trials found that lower-impact aerobic exercise — walking, cycling, and swimming — is the most effective option for easing knee osteoarthritis pain and improving function, ahead of flexibility, strengthening, or mind-body programs. That’s not a marketing claim; it’s the conclusion of one of the largest exercise-comparison studies ever run on this specific condition, as detailed in Harvard Health’s coverage of the research.
For post-surgical or injury rehab, consistency beats intensity every time — this is where budget, low-resistance-ceiling bikes like the Exerpeutic 400XL genuinely shine, because they physically prevent the temptation to overdo it in fragile early weeks. For seniors specifically, the CDC’s activity guidelines recommend 150 minutes of moderate-intensity aerobic activity per week, which can be broken into roughly 30-minute sessions five days a week — a target that maps almost perfectly onto a daily recumbent bike habit, especially with step-through models that remove the fall risk associated with mounting an upright bike.
Long-Term Cost & Maintenance: The Real ROI
A gym membership runs $40 to $60 a month in most U.S. metro areas; a mid-range recumbent bike pays for itself within twelve to eighteen months of regular use, and that math ignores the added convenience of never driving anywhere. Maintenance costs are refreshingly low across every bike on this list — magnetic and electromagnetic resistance systems have no pads to replace, unlike old-school friction-brake bikes, so ongoing costs shrink to the occasional bolt tightening and pedal strap replacement.
| Bike | Price Range | Est. Annual Subscription | 3-Year Total Cost of Ownership |
|---|---|---|---|
| Marcy ME-709 | Under $200 | None | ~$200 |
| Exerpeutic 400XL | Under $250 | None | ~$250 |
| Schwinn 270 | $500-$700 | None | ~$600 |
| SOLE R92 | $900-$1,300 | None | ~$1,100 |
| NordicTrack R10 | ~$1,000-$1,400 | Optional iFIT (~$180/yr) | ~$1,600 |
| NordicTrack Commercial R35 | $1,200-$1,800 | iFIT required for full features (~$468/yr) | ~$2,900 |
| SOLE LCR | $1,500+ | None required | ~$1,600 |
The pattern that jumps out here is subscription creep: bikes that look competitively priced upfront, like the NordicTrack Commercial R35, can quietly overtake the sticker-cheaper SOLE LCR in total three-year cost once you factor in mandatory iFIT fees. If long-term value matters more to you than screen size, subscription-free models deliver a noticeably better return per dollar.
Features That Actually Matter for Joint-Safe Cycling (And Those That Don’t)
What actually matters: flywheel weight, pedal angle, seat/lumbar geometry, and step-through access — every one of these directly changes the physical forces your knee experiences. What doesn’t matter nearly as much as marketing suggests: Bluetooth speaker integration, cup holder placement, and headline resistance-level counts once you’re past roughly 16-20 levels, since most home users never touch the upper third of the resistance range anyway. Heart rate monitoring is genuinely useful for pacing but isn’t knee-specific — you could get the same data from a cheap wrist-worn monitor on any bike. The lesson here is to spend your budget on the mechanical fundamentals first and treat the tech extras as a bonus, not a deciding factor.
FAQ
❓ Is a recumbent bike actually better than a regular bike for bad knees?
❓ How many resistance levels do I really need for knee rehab?
❓ Can a recumbent bike make knee pain worse?
❓ How long should I ride a recumbent bike with bad knees each day?
❓ Do I need a step-through frame if I don't use a wheelchair or walker?
Conclusion
Bad knees don’t have to mean the end of cardio — they just mean being pickier about the equipment you choose. Across all seven bikes here, the throughline is consistent: a heavier flywheel, a knee-friendly pedal angle, and a seat that actually supports your lower back matter more than any touchscreen ever will. Whether you land on the no-frills Marcy ME-709 to test the waters or the clinical-grade SOLE LCR for the long haul, the goal is the same — consistent, gentle movement that builds strength around the joint instead of grinding it down further.
Take the setup steps seriously, especially seat position, since that single five-minute adjustment prevents more discomfort than any dial setting. Give your knee time to adapt before chasing higher resistance, and lean on the framework above to skip the trial-and-error most first-time buyers go through. Your knees got you into this search — the right bike is how you get some of your mobility back.
✨ Ready to find your bike? Check today’s prices on your top pick before you close this tab.
Recommended for You
- 7 Best Magnetic Recumbent Bikes in 2026: Quiet & Proven Picks
- Recumbent Bike With Arm Exercisers: 7 Best Picks for 2026
- 7 Best Recumbent Bikes for Back Pain in 2026
Disclaimer: This article contains affiliate links. As an Amazon Associate, I earn from qualifying purchases. If you purchase products through these links, we may earn a small commission at no additional cost to you.
✨ Found this helpful? Share it with someone whose knees could use the break too! 💬🤗
