
In This Article
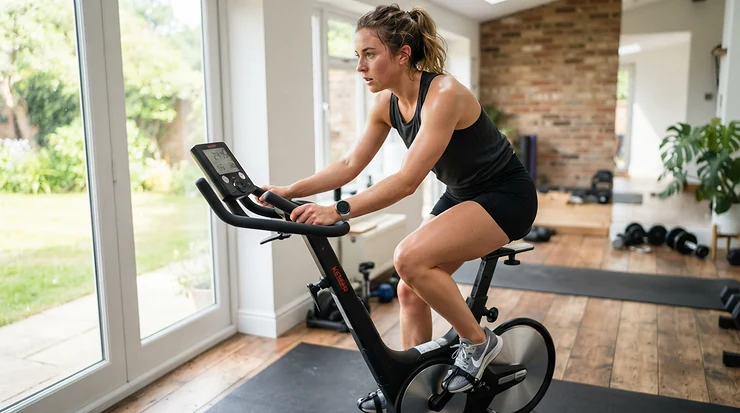
Picture this: you’ve just wrestled a spin bike into the corner of your living room, you’re wearing the sneakers you already own, and the stock pedals have a strap system that seems designed by someone who dislikes feet. Welcome to the exact moment platform pedals for spin bike setups start making sense.
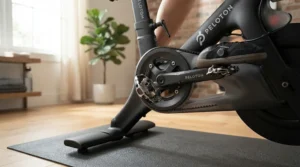
Here’s the plain-English version. A platform pedal is a flat, wide surface you simply step onto. No cleats, no special shoes, no twisting your heel out like you’re squashing a bug. It’s one of the simplest pedal systems in cycling, and for a lot of home riders it’s the right one.
This guide ranks seven real, widely sold options and explains what their specs mean for your workout rather than just repeating them. Everything here comes from spec research and published review roundups. No product was bench-tested for this article, and it doesn’t pretend otherwise. You’ll also get a buying framework, setup tips, a problem-solving guide, and honest advice for the beginner-friendly pedals crowd. If you want the basics of how pedals evolved, that’s a good starting read.
Why does this matter now? A spin bike has a heavy flywheel that keeps moving after your foot slips. The pedal under your foot decides whether your session feels smooth or sketchy.
Quick Comparison Table: Platform Pedals for Spin Bike at a Glance
| Product | Standout trait | Body / grip | Price range* | Best For |
|---|---|---|---|---|
| GEWAGE 3-Bearing Pedals | Large 100×104 mm platform | Pinned flat | Under $40 | Long, steady rides |
| ROCKBROS K307T | Light, sleek, five pins per side | Pinned flat | Under $45 | Leg-speed riders |
| Hapleby Premium Pedals | Wrench in the box | Pinned flat, dual sealed bearings | Under $35 | First-time installers |
| JETCAT Race Pedals | Nylon body, shin-friendlier | Concave nylon | Under $30 | Beginners worried about pins |
| FOOKER MTB 3-Bearing Pedals | Nylon body, Cr-Mo spindle | Non-slip nylon | Under $30 | Budget-first buyers |
| AVASTA Aluminum Alloy Pedals | Around 347 g per pair | Alloy, reflectors | Under $40 | Dual-use bikes |
| DRBIKE Toe-Clip Pedals | Strap retention without clipping in | Platform plus cage | Under $20 | Riders who want a little foot security |
*Price ranges are typical bands at the time of research. Check current price before buying.
Looking at the table, the JETCAT Race Pedals and FOOKER MTB 3-Bearing Pedals are the low-risk entry points for shoe-free cycling. The GEWAGE 3-Bearing Pedals buy you comfort through sheer platform size. The DRBIKE Toe-Clip Pedals are the only option here that adds foot retention. They are the bridge if you want some pull-up power without clip-in shoes.
💬 Just one click — help others make better buying decisions too!😊
Top 7 Platform Pedals for Spin Bike: Expert Analysis
1. GEWAGE 3-Bearing Pedals — widest platform for all-day comfort
The headline here is surface area: a roughly 100×104 mm platform (about 3.9 by 4.1 inches) gives your foot a runway rather than a landing pad.
That size spreads pressure across the sole, which matters in a 45-minute session where a narrow pedal creates a hot spot under the ball of your foot. Three bearings suggest a smooth spin, and a published roundup singles out the bearing feel as the standout trait.
Based on the spec comparison, this is a good match for steady-state riders and anyone doing long endurance sessions in soft-soled trainers. It’s less ideal if you hate large pedals clipping a narrow crank-to-frame clearance. Check your bike’s gap first.
On review sentiment: I couldn’t verify a statistically meaningful pool of buyer reviews for this exact listing, so treat the smoothness praise as one reviewer’s finding rather than a consensus.
Pros:
- ✅ Very large foot platform spreads pressure
- ✅ Three-bearing design points to smooth rotation
- ✅ Great for shoe-free cycling in sneakers
Cons:
- ❌ Bulk may brush tight frames
- ❌ Pins can bite shins on slips
Price range: expect the $25-$40 band; check current price. For comfort-focused riders, the value verdict is strong.
2. ROCKBROS K307T — light, sleek, and surprisingly secure
Five threaded pins per side is the detail worth noticing. It means traction without the aggressive, cheese-grater feel of some mountain-bike flats.
A review roundup calls it light and efficient-feeling, almost like a clipless pedal without the commitment. Verify the exact weight on the current listing, because sellers vary. Lighter pedals matter less on a spin bike than on the road, since you’re not accelerating a bike frame. What you gain is a tidy, low-profile feel and a less clunky stroke.
Here’s what to weigh: thin pedals reward good footwork. If you’re a beginner, a flat sole with a stiff midsole works best, because a squishy running shoe can sag around the pins and feel unstable.
As for reviews, expect sentiment to mirror other pinned alloy flats. Riders usually praise grip and complain about shin scrapes if their foot slips. I couldn’t verify an individual-review dataset for this model, so treat that as a category pattern.
Pros:
- ✅ Five pins per side give secure traction
- ✅ Slim, low-profile design
- ✅ Suits fast-cadence interval sessions
Cons:
- ❌ Needs a stiff-soled shoe for best feel
- ❌ Pins demand a careful foot placement
Price range: roughly the $30-$45 band. Value verdict: worth it if you want a sharper, race-flavored feel.
3. Hapleby Premium Pedals — the one that includes the wrench
It sounds trivial, but a pedal wrench in the box is the difference between a ten-minute swap and a trip to the hardware store. A reviewer flagged that bonus as a genuine plus.
Dual sealed bearings are a mid-tier configuration: not as fancy as triple-bearing setups, but sealed designs keep sweat and dust away from the moving parts. That’s useful in a room where you’re dripping for an hour. Sweat is quietly corrosive.
This is a good fit for first-timers swapping out worn stock pedals. The pitch is simple. You get a complete swap kit and a perfectly serviceable pedal.
On sentiment, published coverage describes it as punching above its price, but I couldn’t verify a large pool of independent buyer reviews. Treat it as a promising budget contender rather than a proven favorite.
Remember the quirk Sheldon Brown documents in his pedal guide: the right pedal has a normal thread but the left pedal has a reverse thread. Tighten the right clockwise, the left counterclockwise.
Pros:
- ✅ Pedal wrench included in the box
- ✅ Dual sealed bearings resist sweat
- ✅ Good price-to-performance reputation
Cons:
- ❌ Fewer bearings than premium rivals
- ❌ Limited verified review depth
Price range: usually under $35. Value verdict: a smart starter pick.
4. JETCAT Race Pedals — nylon body that forgives shin slips
If metal pins make you nervous, this is where to look. A nylon composite body with a concave platform gives your foot a gentle cup rather than a slab of spikes.
Concave matters. It cradles the middle of your shoe, helping you stay centered even when you’re tired and sloppy at minute 40. Three sealed bearings also point to a smooth feel, which a published roundup confirms.
Here’s the honest take: nylon pedals trade a little rigidity for friendliness. They’re ideal for beginner-friendly pedals territory, where the priority is confidence rather than maximum power transfer. Heavy sprinters might feel a hint of flex, though the review coverage doesn’t flag it as a deal-breaker.
The roundup describes it as more forgiving on shins during mis-steps. That’s a design-based claim you can sanity-check yourself: no sharp metal edge, no bite.
Pros:
- ✅ Nylon body is gentler on shins
- ✅ Concave platform keeps feet centered
- ✅ Three sealed bearings for smooth spin
Cons:
- ❌ Less rigid than alloy options
- ❌ Plastic may scuff over years
Price range: generally under $30. Value verdict: a standout for new riders.
5. FOOKER MTB 3-Bearing Pedals — budget workhorse with a Cr-Mo spindle
The two-part promise: a rugged nylon fiber body and a chrome-moly spindle. Chrome-moly steel is stronger than basic carbon steel, so it resists bending under the repetitive load of a long-term home routine.
A review site labels it the best-value pick in its list. Value, in pedals, usually means “does the job without drama,” and that fits a spin bike nicely. You’re not hitting rocks. You’re hitting a flywheel.
Who’s it for? Anyone building a basic bike pedals setup on a tight budget. The risk with ultra-cheap pedals is loose bearings that wobble. Three sealed bearings, as claimed, point in the right direction, though I couldn’t verify long-term durability from independent owner reports.
My advice: spin the pedal by hand when it arrives. If it feels gritty, return it. That ten-second test saves months of regret.
Pros:
- ✅ Chrome-moly spindle is tougher than basic steel
- ✅ Three sealed bearings at a low price
- ✅ Nylon body keeps weight down
Cons:
- ❌ Nylon can feel plasticky underfoot
- ❌ Long-term durability unverified
Price range: typically under $30. Value verdict: great for budget buyers.
6. AVASTA Aluminum Alloy Pedals — compact alloy with built-in reflectors
At roughly 347 g per pair with a 3.9 by 3.6 inch platform, this sits in the sweet middle. It’s lighter than hulking cast pedals yet roomy enough for sneakers.
The integrated reflectors are a quirk. On a spin bike they’re irrelevant, but if you move these pedals to a commuter bike later, you’ve got a safety bonus. Sealed bearings keep the spindle clean, and the listing is 9/16 inch only, so check your crank first. Plenty of spin bikes use 9/16, but not all.
Based on the spec sheet, the alloy body should feel more rigid than nylon rivals. That rigidity translates into a crisper stroke when you push hard on a standing climb.
Reviews? The listing-based coverage I found was thin, so I’m not going to invent a consensus. Spec-wise it’s solid, and that’s all I can responsibly say.
Pros:
- ✅ Rigid alloy body feels crisp
- ✅ Compact yet comfortable platform
- ✅ Reflectors help if used outdoors later
Cons:
- ❌ 9/16 inch thread only
- ❌ Limited verified owner feedback
Price range: roughly $25-$40. Value verdict: a flexible, dual-use choice.
7. DRBIKE Toe-Clip Pedals — strap security without clip-in shoes
This is the odd one out, and deliberately so. An aluminum platform with a steel cage and adjustable strap, sold in the sub-$20 range according to one roundup, it targets people who want a bit of retention.
Straps allow a modest pull-up phase, so your hamstrings and hip flexors join the party. As Sheldon Brown’s glossary notes, toe-clippable pedals can be used with normal street shoes. Loosen the strap and it behaves like a plain flat.
Is it truly no-clip bike pedals territory? Mostly yes: you never lock in, and you can slide out sideways. But a tight strap can trap a foot in a panic, so keep it loose until you’re confident.
Reviews for this model weren’t verifiable at scale, but the budget-strap category generally earns praise for price and criticism for fiddly adjustments.
Pros:
- ✅ Strap adds gentle foot retention
- ✅ Works with ordinary sneakers
- ✅ Very low cost of entry
Cons:
- ❌ Straps can feel fiddly mid-ride
- ❌ Cage may rub wider shoes
Price range: under $20. Value verdict: a cheap way to try retention.
What Are Platform Pedals for Spin Bike?
Platform pedals for spin bike setups are flat, wide pedals that let you ride in ordinary shoes without cleats, straps, or locking mechanisms. They screw into the crank arm, typically with a 9/16 inch thread, and provide a stable surface that you step onto and off freely. They suit beginners and casual riders best.
Why they exist
Clip-in systems prioritize efficiency; platforms prioritize freedom. Indoor cycling classes often use toe clips or clipless receptacles so one foot can pull while the other pushes. Platforms skip that, trading a little power for a lot of ease.
Flat vs. platform: a quick vocabulary note
Strictly speaking, platform pedals once meant a pedal built for toe clips, and many folks now use “platform” and “flat” interchangeably. In this article, flat pedals exercise bike talk and platform pedals for spin bike talk mean the same practical thing: a cageless, shoe-friendly pedal.
Thread size: the one fact you can’t skip
Most adult pedals use a 9/16 inch by 20 TPI thread, while one-piece cranks use 1/2 inch. If your bike is a cheap budget model, test-fit first.
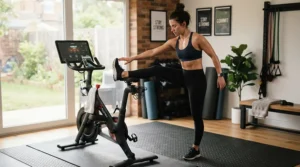
How to Choose Platform Pedals for Spin Bike (7 Steps)
- Confirm thread size. Look at your crank or manual. Most are 9/16 inch; some budget bikes use 1/2 inch. Buying the wrong one is the most common waste of money.
- Pick a body material. Alloy feels stiffer and more premium; nylon is lighter on shins and wallet. Match it to your tolerance for pins.
- Check platform size. A wider surface stabilizes your foot but may clip a tight frame. Measure the gap.
- Inspect the grip system. Pins grip sneakers beautifully but punish slips. Concave nylon grips less aggressively and forgives more.
- Look for sealed bearings. Sweat is the silent killer of pedals. Sealed bearings are a baseline requirement for indoor use.
- Decide on retention. If you crave pull-up power without special shoes, consider a cage or strap model. If not, stay flat.
- Set a realistic budget. For simple pedal systems, most good options sit well under $50. Past that you’re paying for weight savings you won’t feel.
For a broader primer, Sheldon Brown’s pedal guide remains one of the clearest technical references.
Setup and First 30 Days: A Practical Usage Guide
Swapping pedals takes about ten minutes, yet people still manage to cross-thread them. Here’s a clean routine.
Install carefully. Grease the threads lightly. Start each pedal by hand until it turns smoothly for a few rotations, then snug it with a wrench. Remember the reverse thread on the left side.
Check the fit. Sit on the bike with cranks horizontal. Your knee should sit roughly above the pedal, a form cue echoed in UPMC’s indoor cycling guidance, which also reminds riders that pedals move both ways rather than only down.
Week one: ride at low resistance and focus on foot placement. The ball of your foot should sit over the pedal axle. Resistance too light is a common error because the flywheel can carry you away from your own feet.
Weeks two to four: retighten the pedals after the first few rides, since new threads settle. Wipe the pedals after sweaty sessions.
Common first-month mistakes: cranking resistance too high with sloppy form; wearing flimsy flip-flops; forgetting to retighten. Fix those three and your shoe-free cycling experience becomes calm and repeatable.
Real-World Scenarios: Which Pedal Fits Which Rider
| Rider profile | Frequency | Budget | Best match |
|---|---|---|---|
| Beginner, shin-nervous | 3x per week, 30 min | Under $30 | JETCAT Race Pedals |
| Interval fan in sneakers | 4x per week, 45 min | $30-$45 | ROCKBROS K307T |
| Shared family bike | Daily, mixed users | Under $40 | GEWAGE 3-Bearing Pedals |
| Tight-budget starter | 2-3x per week | Under $20 | DRBIKE Toe-Clip Pedals |
Picture a college student riding a spin bike in a shared dorm gym three times a week. Different shoes, different feet. Roomy flats like the GEWAGE 3-Bearing Pedals handle that chaos best.
Now picture someone recovering their fitness after a layoff, riding 30 gentle minutes each day. The JETCAT Race Pedals lower the stakes of any slip.
For a competitive type chasing intervals, the ROCKBROS K307T offers a sharper feel, while a budget-tight household may start with the FOOKER MTB 3-Bearing Pedals and upgrade later. This table is reasoning based on specs, not a lab test, so adapt it to your shoes and bike.
Flat Pedals Exercise Bike vs. Clip-In vs. Toe Cage
| Feature | Flat / platform | Toe cage / strap | Clip-in (SPD / Delta) |
|---|---|---|---|
| Shoes needed | Any stiff-ish sneaker | Any shoe | Cleated shoes |
| Learning curve | Minimal | Low | Moderate |
| Pull-up power | None | Some | Strong |
| Entry cost | Lowest | Lowest | Higher (shoes too) |
| Best For | Casual, shoe-free cycling | Budget retention | Performance riders |
A flat pedal gives up pull-up power but delivers instant freedom: hop on, hop off. The DRBIKE Toe-Clip Pedals sit between worlds, while clip-in systems reward riders who ride often enough to justify cleated shoes.
The practical takeaway is simple. If you ride a few times a week for fitness, the efficiency gain of clipping in is small compared with the benefit of actually enjoying your sessions. If you’re chasing power numbers, clip-ins win. Most home riders aren’t, and that’s perfectly fine.
✨ Don’t Miss These Exclusive Deals!
🔍 Ready to upgrade your spin bike? Click on any highlighted product above to check current pricing and availability. A good pedal swap is one of the cheapest comfort upgrades you can make for your home workouts!
Features That Actually Matter (And Those That Don’t)
What matters: thread compatibility, sealed bearings, a platform wide enough for your shoe, and a grip style you trust. These four decide whether you’ll enjoy your pedals or resent them.
What barely matters: a few grams of weight. On a stationary bike, you’re not lifting the bike up a hill, so a lighter pedal won’t change your workout. Reflectors are also irrelevant indoors, which makes the reflector extras on the AVASTA Aluminum Alloy Pedals a bonus rather than a feature to pay for.
Marketing fluff to ignore: exaggerated “race-grade” claims. Spin bikes aren’t races. Likewise, “CNC machined” sounds impressive, but a sealed bearing matters more than a manufacturing buzzword.
Think of it like buying running shoes. The fit and cushioning matter. The color name doesn’t. The same logic applies to simple pedal systems: pick the boring essentials, ignore the shiny extras.
Basic Bike Pedals vs. Upgrades: What You Keep and What You Give Up
Basic bike pedals are the unglamorous heroes of home cycling. They require no cleats, no special shoes, and no clipping-in anxiety. For many riders, the lack of ceremony is the entire appeal.
What do you give up? Mainly pull-up efficiency and a locked-in feel during fast intervals. What do you keep? Quick dismounts, shared-bike convenience, and a lower total cost.
If your pedals eventually feel limiting, you can graduate to cages or clip-ins. Until then, stay simple. A cheap, well-sealed flat pedal will outlast a poorly chosen premium one that doesn’t suit your riding.
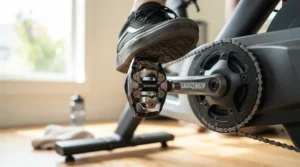
No-Clip Bike Pedals: Who They’re Really For
No-clip bike pedals suit three groups well: beginners, shared-bike households, and anyone who likes to ride in whatever shoes they have.
They also suit riders with mobility concerns who worry about a foot stuck in a fixed binding. A flat surface lets you step off immediately if something feels wrong. That peace of mind alone justifies the choice for many.
The trade-off is control during aggressive standing efforts. A pinned alloy pedal such as the ROCKBROS K307T helps, because pins hold your sole in place. Meanwhile the DRBIKE Toe-Clip Pedals offer a middle path if you want a bit of retention.
Beginner-Friendly Pedals: Advice for Specific Audiences
Brand-new riders: start with forgiving nylon like the JETCAT Race Pedals or FOOKER MTB 3-Bearing Pedals. Fewer sharp edges mean fewer scars during your learning phase.
Seniors or comeback riders: prioritize large platforms and easy exits. The GEWAGE 3-Bearing Pedals give you generous foot room, and a flat design avoids any clip-in panic.
Families sharing one bike: pick a universal flat so everyone can wear different shoes. A swap-friendly option like the Hapleby Premium Pedals is easy to install and uninstall, since the wrench is included.
Intermediate riders: step up to alloy and consider a cage option for variety. For more on the benefits of regular cycling, indoor routines are consistently framed as low-impact cardio in coverage summarizing Mayo Clinic’s aerobic exercise benefits.
Shoe-Free Cycling: Can You Really Ride Barefoot or in Socks?
Shoe-free cycling sounds liberating, but it needs caveats. Pinned metal pedals and bare feet are a bad combination, since pins can puncture skin. If you want to ride shoe-free, choose a smooth, concave nylon pedal and expect a less secure feel.
Honestly, the best compromise is a lightweight, flat-soled shoe worn only for the bike. It keeps your foot protected, spreads pressure, and works with every pedal on this list.
Some dual-sided SPD-plus-flat hybrids advertise barefoot-friendly flat sides, but they are a different product category from the pure platform pedals reviewed here. Evaluate those separately if you’re curious.
Problem → Solution Guide
Problem: my foot keeps slipping. Solution: upgrade to a pinned or concave pedal, and wear stiffer shoes. A rubbery sole on a smooth pedal is a slip waiting to happen.
Problem: the pins scrape my shins. Solution: switch to a nylon pedal like the JETCAT Race Pedals, or shorten the pins if the model allows it. Also work on foot placement.
Problem: the pedal feels gritty or wobbly. Solution: this points to bearing trouble. Return the pedal if it’s new, or clean and re-grease it if it’s old.
Problem: the pedal won’t thread in. Solution: stop immediately. You’re probably cross-threading, or you have the wrong thread size. Back it out and restart by hand.
Problem: my arches ache. Solution: a wider platform like the GEWAGE 3-Bearing Pedals spreads pressure better than a narrow one.
Common Mistakes When Buying Platform Pedals for Spin Bike
The biggest mistake is ignoring the thread size, followed closely by buying aggressive pins when you’re a beginner. Another classic is assuming every pedal is universal. Pedals are close to interchangeable, but crank type still matters.
People also overspend on weight savings. Shaving grams is irrelevant on a stationary bike, and spending an extra $50 for it is poor value. Instead, put that money toward a stiff-soled shoe, which improves comfort more than most pedal upgrades.
Finally, many buyers skip the hand-spin test. Spin the pedal when it arrives. A smooth, quiet rotation tells you more than any product description.
Long-Term Cost & Maintenance
| Tier | Typical range | Example | Maintenance | Value verdict |
|---|---|---|---|---|
| Budget | Under $20-$30 | DRBIKE Toe-Clip Pedals, FOOKER MTB 3-Bearing Pedals | Wipe and retighten | Great for starters |
| Mid | $30-$40 | GEWAGE 3-Bearing Pedals, Hapleby Premium Pedals | Occasional re-grease | Best overall value |
| Upper-mid | $40-$50 | ROCKBROS K307T, AVASTA Aluminum Alloy Pedals | Light cleaning | Worth it if you ride often |
Looking at this, the cost difference between tiers is small, usually less than a single boutique class. Total cost of ownership depends more on how long they last than the sticker price. A $20 pedal that fails in a year is pricier than a $35 one that lasts five.
For upkeep, wipe sweat off after hard sessions, check tightness monthly, and re-grease threads once or twice a year. That’s it. Simple pedal systems earn their name.
Frequently Asked Questions
❓ Can I use platform pedals for spin bike workouts with regular sneakers?
❓ Are flat pedals exercise bike setups safe at high cadence?
❓ Will no-clip bike pedals fit my Peloton-style bike?
❓ How much should basic bike pedals cost?
❓ Is beginner-friendly pedals territory too basic for fitness gains?
Conclusion
So, what’s the verdict on platform pedals for spin bike setups? Keep it simple, and match the pedal to your habits rather than your ambitions.
If you’re nervous about pins, the JETCAT Race Pedals are the gentlest start. If budget is king, the FOOKER MTB 3-Bearing Pedals and DRBIKE Toe-Clip Pedals keep costs tiny. If comfort matters most, the GEWAGE 3-Bearing Pedals give you the roomiest platform, while the ROCKBROS K307T and AVASTA Aluminum Alloy Pedals reward riders who want a stiffer, sharper feel. And the Hapleby Premium Pedals make the swap itself painless.
Remember the essentials: confirm your thread size, choose sealed bearings, and test the spin by hand. Everything else is detail. Shoe-free cycling, no-clip freedom, and basic bike pedals aren’t compromises. They’re a legitimate way to enjoy your bike.
Recommended for You
- Dual Sided Bike Pedals: 7 Best Picks Compared For 2026
- SPD Pedals For Spin Bike: 7 Ultimate Picks For 2026
- Exercise Bike Pedals With Straps: 7 Proven Picks For 2026
Disclaimer: This article contains affiliate links. As an Amazon Associate, I earn from qualifying purchases. If you purchase products through these links, we may earn a small commission at no additional cost to you.
✨ Found this helpful? Share it with your friends! 💬🤗
